Building your own PC can be an exciting and rewarding experience. Not only will you gain a deeper understanding of how computers work, but you will also have complete control over the components you choose, allowing you to tailor your machine to your specific needs. Whether you’re building a gaming rig, a workstation for creative tasks, or a simple home computer, this beginner’s guide will walk you through the essential steps to build your own PC from scratch.
1. Why Build Your Own PC?
There are many benefits to building your own PC:
-
Customization: You can choose every component based on your needs and budget. Whether you need a high-end gaming rig or an efficient budget build, building your own PC lets you hand-pick the best parts.
-
Cost Efficiency: When you build your own PC, you often get better value for money compared to pre-built systems. By choosing components that are cost-effective but still meet your needs, you can avoid paying for unnecessary features.
-
Upgradability: As technology advances, you can easily upgrade individual components rather than replacing the entire system. This flexibility is one of the major advantages of building your own PC.
-
Learning Experience: Building a PC allows you to learn more about how computers work. It’s a hands-on experience that teaches you about the hardware that powers modern computing.
Before diving into the process, it’s essential to understand the basic components that make up a PC. These include the central processing unit (CPU), motherboard, graphics card (GPU), RAM, storage devices (HDD or SSD), power supply unit (PSU), and computer case.
2. Choosing the Right Components
When building your own PC, selecting the right components is crucial. Here’s a breakdown of the main parts:
Central Processing Unit (CPU)
The CPU is the heart of your computer. It processes all the instructions and is responsible for the overall speed and performance of your PC. Popular CPU brands include Intel and AMD. When selecting a CPU, consider factors like:
-
Core Count: More cores allow for better multitasking and faster performance.
-
Clock Speed: Higher clock speeds mean faster performance in tasks like gaming or video editing.
-
Compatibility: Make sure the CPU is compatible with your motherboard’s chipset and socket.
Motherboard
The motherboard is the main circuit board that connects all the components of your PC. When choosing a motherboard, look for:
-
Socket Type: The motherboard must be compatible with your CPU’s socket type (e.g., LGA 1200 for Intel or AM4 for AMD).
-
Form Factor: Choose a motherboard that fits in your case (ATX, micro-ATX, or mini-ITX).
-
Connectivity: Ensure the motherboard has enough USB ports, Ethernet ports, and other connectors you might need.
Graphics Processing Unit (GPU)
The GPU, or graphics card, is essential for rendering images, videos, and animations. If you’re into gaming, video editing, or 3D rendering, a powerful GPU is a must. Some popular brands include NVIDIA and AMD. When selecting a GPU, consider:
-
VRAM: More VRAM is needed for gaming at higher resolutions or for demanding tasks like 3D rendering.
-
Compatibility: Ensure the GPU fits in your case and is compatible with your motherboard’s PCIe slots.
Memory (RAM)
RAM allows your CPU to access data quickly. When choosing RAM, consider:
-
Size: 8GB is the minimum for basic tasks, but 16GB or 32GB is recommended for gaming or heavy multitasking.
-
Speed: Faster RAM speeds can slightly improve performance, especially in tasks like gaming or video editing.
-
Dual-Channel: For better performance, it’s recommended to use RAM in dual-channel configurations.
Storage (SSD vs. HDD)
There are two main types of storage devices: SSD (Solid-State Drive) and HDD (Hard Disk Drive).
-
SSD: Faster, more reliable, and more energy-efficient. Recommended for your operating system and frequently used programs.
-
HDD: Cheaper but slower. Ideal for additional storage like games, media, and backups.
Power Supply Unit (PSU)
The PSU provides power to all the components of your PC. Make sure to choose a PSU with:
-
Wattage: Ensure the wattage is sufficient for all your components. Typically, a 550W to 750W PSU should suffice for most builds, but higher-end systems may require more.
-
Efficiency Rating: Choose a PSU with an 80+ certification to ensure energy efficiency.
PC Case
The PC case houses all the components. Choose one that:
-
Fits all components: Ensure the case can accommodate your motherboard, GPU, storage devices, and cooling system.
-
Has good airflow: Proper airflow helps keep your PC cool, preventing overheating.
-
Offers cable management: A case with good cable management options will keep your build clean and organized.
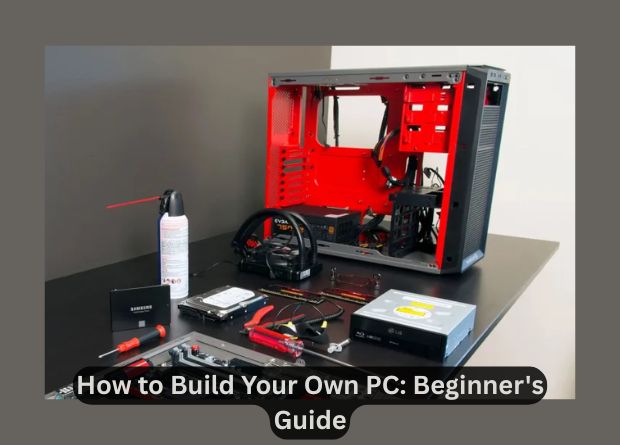
3. Assembly Steps
Once you’ve gathered all your components, it’s time to assemble them. Here’s a simple step-by-step guide:
Step 1: Install the CPU
-
Carefully place the CPU into the motherboard’s socket, aligning the notches. Be sure not to touch the pins.
-
Lock the CPU in place with the socket lever.
Step 2: Install RAM
-
Open the RAM slots on the motherboard.
-
Align the RAM sticks with the slots and press down firmly until they click into place.
Step 3: Install the Motherboard
-
Secure the motherboard into the case using screws, ensuring it’s properly aligned with the I/O shield (the metal panel at the back of the case).
Step 4: Install the CPU Cooler
-
Attach the CPU cooler according to the manufacturer’s instructions. If you’re using an aftermarket cooler, make sure it’s compatible with your CPU and motherboard.
Step 5: Install Storage
-
For SSDs, connect them to the motherboard using SATA or M.2 slots (depending on the type).
-
Mount the SSD or HDD in the case.
Step 6: Install the GPU
-
Insert the GPU into the motherboard’s PCIe slot. Secure it with screws.
Step 7: Connect the Power Supply
-
Connect the PSU to the motherboard, GPU, and storage devices using the appropriate power cables.
Step 8: Wire Everything
-
Tidy up the cables to ensure proper airflow and easy maintenance.
Step 9: Test the Build
-
Double-check all connections and turn on the PC. If everything works correctly, you’ll see the BIOS screen.
4. Installing the Operating System
After assembling the hardware, you’ll need to install an operating system (OS) such as Windows, Linux, or macOS (if you’re building a Hackintosh). For most users, Windows is the easiest choice.
-
Create a bootable USB drive: Download the Windows installation media from the official Microsoft website and create a bootable USB drive using tools like Rufus.
-
Install the OS: Insert the USB drive into the PC and boot from it. Follow the on-screen instructions to install Windows.
Also Check:
- 5G vs Wi-Fi 6: What’s the Difference?
- Tips to Boost Your Internet Speed at Home
- How to Set Up Dual Monitors Like a Pro
- Best Programming Languages to Learn
- Why Cybersecurity Matters More Than Ever
5. Final Thoughts
Building your own PC may seem intimidating at first, but with the right components and a bit of patience, you can assemble a powerful machine tailored to your needs. Whether you’re gaming, editing videos, or working from home, a custom-built PC can offer superior performance, upgradability, and a personal touch.
Remember to stay within your budget, and take your time during the assembly process. If you’re unsure about any steps, there are plenty of online resources and communities (such as Reddit’s PC Building Community) that can offer advice and guidance.
External Resources:
-
PCPartPicker: A great resource for finding compatible PC parts and checking prices.
-
Tom’s Hardware: Offers in-depth guides and reviews for PC components.
-
Linus Tech Tips: A popular YouTube channel with tutorials on PC building and tech reviews.
Building your own PC is not only an investment in technology but also a rewarding learning experience. Enjoy the process and happy building!